MetaMask is a free, non-custodial crypto wallet that runs as a browser extension and a mobile app. Setting it up takes under five minutes. This guide covers every step, from installing the extension to securing your Secret Recovery Phrase and connecting to your first dApp.
What is MetaMask?
MetaMask is a non-custodial software wallet for Ethereum and every EVM-compatible network. It is available as a browser extension for Chrome, Firefox, Brave, and Edge, and as an app for iOS and Android. It was developed by ConsenSys, launched in 2016, and now has more than 30 million active users.
Because MetaMask is non-custodial, you hold your own private keys. No company or third party controls your funds. This is different from leaving crypto on a centralised exchange, where the exchange holds the keys on your behalf. MetaMask is a hot wallet: it stays connected to the internet, which makes it convenient for daily use but more exposed than a hardware wallet that stores keys fully offline. For most beginners, MetaMask is the starting point for interacting with Ethereum and the broader web3 space. What the Ethereum network is and how it operates is covered in the guide on what Ethereum is.
How to install MetaMask
Always install MetaMask from the official source. Fake versions circulate through search engine ads and unofficial app stores.
The steps below apply to both browser and mobile.
Installing the browser extension
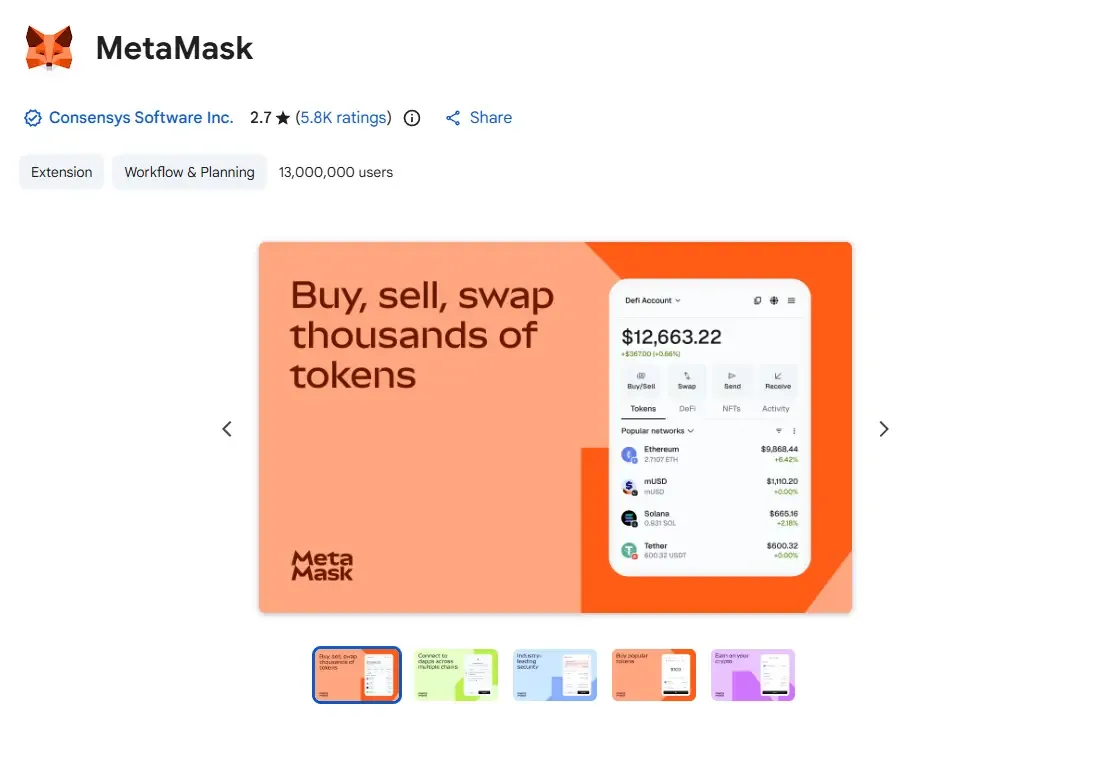
- Open metamask.io directly in your browser. Do not click ads in search results. Type the URL manually or bookmark it.
- Click Download and select your browser: Chrome, Firefox, Brave, or Edge.
- Click Add to Chrome (or the equivalent for your browser) and confirm the permissions prompt.
- Pin the MetaMask icon to your toolbar for easy access.
The browser extension appears as an orange fox icon. Fake extensions copy this icon exactly. The only way to avoid them is to install from metamask.io rather than from a search result or ad.
Installing MetaMask on mobile
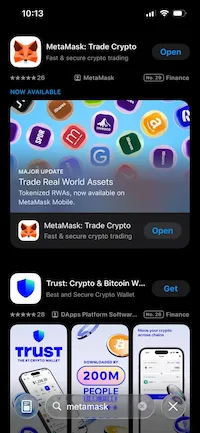
- On iOS, open the App Store and search for MetaMask. The publisher is ConsenSys.
- On Android, open Google Play and search for MetaMask. Confirm the publisher is ConsenSys before tapping Install.
- Check the number of installs and reviews before downloading. The official app has millions of downloads. A low install count is a warning sign.
Fake MetaMask apps use names and icons nearly identical to the original. Always verify the publisher name is ConsenSys and the install count is in the millions before proceeding.
How to create a new MetaMask wallet
Open the MetaMask extension or app. Select Create a new wallet. The setup runs through three steps: setting a password, backing up your Secret Recovery Phrase, and confirming it.
Step 1: create a password
Enter a strong, unique password of at least eight characters. This password protects access to the MetaMask extension on this specific device. It is not the same as your Secret Recovery Phrase, and it cannot restore your wallet on a different device.
This distinction matters. If your computer is lost, stolen, or wiped, the password is useless on its own. Only your Secret Recovery Phrase can restore access to your funds on a new device. A strong password protects you if someone has brief physical access to your machine, but it is not a backup.
Step 2: back up your Secret Recovery Phrase
MetaMask generates a Secret Recovery Phrase: a sequence of 12 words that acts as the master key to your wallet. Anyone who has this phrase can import your wallet on any device and access all your funds. Store it with the same care you would give physical cash.
What not to do with your Secret Recovery Phrase:
- Do not take a screenshot or photograph it
- Do not save it in cloud storage such as Google Drive, iCloud, or Dropbox
- Do not email it to yourself or send it via SMS
- Do not type it into any website, form, or app other than MetaMask itself
- Do not share it with anyone, including people claiming to be MetaMask support
What to do: write the 12 words on paper in the correct order and store the paper in a physically secure location. For long-term storage of significant value, some holders stamp the phrase onto a metal plate, which survives fire and water damage better than paper. Keep a second copy in a different physical location as an off-site backup.
MetaMask will never ask for your Secret Recovery Phrase. Any website, email, direct message, or person asking you to enter your seed phrase is attempting to steal your funds. This applies to social media accounts, Discord servers, and anyone claiming to offer support.
Step 3: confirm your Secret Recovery Phrase
MetaMask asks you to confirm the Secret Recovery Phrase by clicking the 12 words in the correct order. This step verifies that you wrote the phrase down accurately before proceeding. Once you confirm, the wallet is created and ready to use.
How to import an existing MetaMask wallet
If you already have a MetaMask wallet on another device, or you are restoring a wallet after a device change, select Import an existing wallet on the setup screen instead of creating a new one.
Two options are available. The first uses your Secret Recovery Phrase and imports the entire wallet including all accounts derived from it. Use this to restore a previous MetaMask wallet or move it to a new device. The second uses a private key and imports a single specific account. Use this to add an account from a different application or wallet.
On mobile, MetaMask offers a QR code option. Generate the QR code on your desktop version under Settings and scan it with your phone instead of typing the 12 words manually. This is faster and reduces the chance of entry errors. How ETH moves between wallets once yours is set up is covered in the guide on how to transfer Ethereum.
How to add funds to your MetaMask wallet
A new MetaMask wallet starts empty. You need ETH to pay gas fees on any transaction, so adding ETH is the first practical step after setup.
Receive ETH from another wallet or exchange
Click the account name at the top of the MetaMask interface to copy your wallet address. Alternatively, click Receive to display a QR code. Your wallet address is a 42-character string starting with 0x. Share this address with the sender or paste it as the withdrawal destination on an exchange.
Make sure the sender selects the Ethereum Mainnet network when sending ETH to your wallet address. Receiving ETH sent on a different network such as BNB Chain or Polygon requires that network to be active in your MetaMask. For a full guide on buying ETH before transferring it to your wallet, see the guide on how to buy Ethereum.
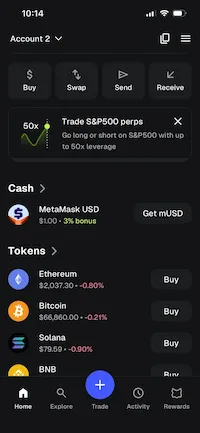
Buy crypto directly in MetaMask
MetaMask has a built-in fiat on-ramp. Click Buy and select a provider such as MoonPay or Transak. Payment options include credit card, debit card, and bank transfer depending on your region. Provider fees typically run 3-5% on top of any card or transfer fees from your bank. For most users, buying on a centralised exchange and transferring to MetaMask is cheaper, but the built-in option is more convenient for small amounts. What ETH is and why every transaction on the network requires it is covered in the guide on what ETH is.
How to send and receive crypto with MetaMask
Once your MetaMask wallet has a balance, you can send ETH or any ERC-20 token to another address.
Always keep a small ETH reserve for gas fees, typically 0.001 to 0.005 ETH, even when sending tokens.
How to send ETH or tokens
- Click Send in the MetaMask interface.
- Enter the recipient wallet address or ENS name. Double-check the address after pasting.
- Select the correct network. For an ETH transfer, select Ethereum Mainnet.
- Enter the amount to send.
- Review the estimated gas fee. You can select slow, medium, or fast depending on how quickly you need the transaction confirmed.
- Click Confirm to send.
Verify the network before confirming. Sending ETH on the wrong network to an exchange deposit address expecting Ethereum Mainnet means the funds will not arrive in your exchange account. Recovery from this mistake costs $50 to $150 at most exchanges. The full mechanics of gas fees are covered in the guide on Ethereum gas fees.
How to swap tokens in MetaMask
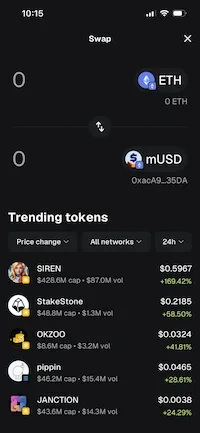
MetaMask has a built-in swap function. Click Swap, select the token you want to sell, select the token you want to receive, enter the amount, and confirm. MetaMask queries multiple DEX aggregators and shows the best available quote.
The MetaMask swap fee is 0.875% of every transaction, in addition to the gas fee for the on-chain swap. This fee is built into the quoted price. For larger amounts, connecting to Uniswap or another DEX directly may offer better rates with a lower service fee.
How to add networks to MetaMask
Ethereum Mainnet is the default network when you first set up MetaMask. To use other EVM-compatible chains such as Polygon, Arbitrum, Base, or BNB Chain, you need to add them.
Click the network dropdown at the top of the MetaMask interface and select Add network. MetaMask shows a list of popular networks that can be added automatically. Click Add next to any network in the list and confirm the prompts.
For a custom network not in the list, you need four pieces of information: the RPC URL, the chain ID, the network name, and the currency symbol. The RPC URL is the address of the server that connects MetaMask to that network. The chain ID is a unique number that identifies the network: Ethereum Mainnet uses chain ID 1, Polygon uses 137, Arbitrum uses 42161. Use Chainlist.org to find verified RPC URLs and chain IDs for any EVM network. How Ethereum processes transactions across these networks is explained in the guide on how Ethereum works.
How to connect MetaMask to a dApp
Most DeFi protocols, NFT marketplaces, and web3 applications require a wallet connection to interact with them. Connecting MetaMask takes a few seconds.
- Open the dApp in your browser, for example Uniswap, Aave, or OpenSea.
- Click Connect Wallet or Connect on the dApp interface.
- Select MetaMask from the list of wallet options.
- A MetaMask popup appears showing which information the dApp is requesting: typically your wallet address and token balances.
- Click Connect to approve. The dApp can now see your address but cannot move funds without your explicit approval of each transaction.
To disconnect a dApp, open MetaMask, go to Settings, select Connected Sites, and click Disconnect next to any site you no longer use. Clearing unused connections reduces your exposure if a dApp is later compromised. How smart contracts power every dApp interaction is explained in the guide on what smart contracts are.
Token approvals: what they are and why they matter
When you interact with a DEX or DeFi protocol for the first time, the application asks you to sign a token approval. This gives the protocol permission to spend a specific token from your wallet without requiring your confirmation on every individual transaction.
A token approval is not the same as sending funds. It is a standing permission. The risk arises when the approval is set to unlimited: the smart contract can then pull any amount of that token from your wallet at any future point, including after you have stopped using the protocol. Malicious contracts exploit unlimited approvals to drain wallets. This is one of the most common ways people lose funds in DeFi. The role of smart contracts in processing token approvals is explained in the guide on the Ethereum Virtual Machine.
To check and manage your existing token approvals, go to Revoke.cash, connect your wallet or paste your address, and review the list of active approvals. Click Revoke next to any permission you no longer need. This removes the standing permission without affecting your token balance.
Two rules that prevent most wallet drain incidents: never grant unlimited approval to a contract you are not certain about, and check your active approvals on Revoke.cash every few months to clean up permissions from protocols you no longer use.
MetaMask security: protecting your wallet
The most common ways people lose funds through MetaMask are phishing, fake apps, token approval drains, and social engineering. Each has a straightforward defence.
Protecting your Secret Recovery Phrase
MetaMask will never ask for your Secret Recovery Phrase through any channel outside the app itself during wallet recovery. Any website, popup, email, or direct message requesting your seed phrase is a scam. This includes Twitter or Discord accounts that appear to belong to MetaMask or its support team.
Phishing sites replicate the MetaMask interface and the interfaces of popular dApps with high accuracy. Before entering any sensitive information or signing any transaction, verify the URL in your browser. Uniswap is at app.uniswap.org, not uniswap-app.io or any variation. Bookmark official dApp URLs and use bookmarks rather than search results.
Fake MetaMask extensions and apps
Fake MetaMask extensions look identical to the real one and appear in search results alongside the official version. The fake extension records your Secret Recovery Phrase during setup and empties your wallet before you know anything is wrong. Always install from metamask.io directly, never from a Google or Bing search result.
On mobile, a fake MetaMask app in the App Store or Google Play uses the same orange fox icon and similar naming. Check that the developer name is ConsenSys and that the app has millions of installs and recent reviews before downloading.
Use a hardware wallet for large holdings
MetaMask connects to hardware wallets including Ledger and Trezor. When connected, the MetaMask interface handles the display and transaction composition, while the hardware wallet holds the private key and signs transactions offline. The private key never touches your computer or phone.
For holdings above $1,000 or any amount you plan to keep long-term, connecting MetaMask to a Ledger or Trezor combines the convenience of the MetaMask interface with the security of cold storage. How Ethereum validates and records transactions signed by these keys is covered in the guide on Ethereum proof of stake.
Set the auto-lock timer
By default, MetaMask locks itself after 60 minutes of inactivity. Anyone with physical access to an unlocked device can use the wallet without entering the password. To reduce this window, go to Settings, select Advanced, and change the auto-lock timer to 5 or 15 minutes. This setting exists in both the browser extension and the mobile app.
FAQ
What is MetaMask used for?
MetaMask is used to store, send, and receive ETH and ERC-20 tokens, to connect to DeFi protocols such as Uniswap and Aave, to buy and sell NFTs on marketplaces such as OpenSea, and to interact with any application built on Ethereum or an EVM-compatible network. It is the most widely used wallet for web3 applications, with over 30 million users.
Is MetaMask safe to use?
MetaMask is as safe as the practices of the person using it. The wallet code itself is open-source and audited. The risks come from user actions: sharing the Secret Recovery Phrase, installing a fake extension, granting unlimited token approvals, or connecting to a phishing site. Following the security steps in this guide, particularly around seed phrase storage and token approval management, eliminates the majority of these risks.
What is the Secret Recovery Phrase and why does it matter?
The Secret Recovery Phrase is a sequence of 12 words generated when you create a MetaMask wallet. It is the master key to your wallet. Anyone who has it can import your wallet on any device and access your funds. It cannot be reset or recovered if lost. Write it down on paper, store it somewhere physically secure, and never share it with anyone or enter it on any website other than MetaMask itself.
What happens if I lose my Secret Recovery Phrase?
If you lose your Secret Recovery Phrase and also lose access to your device, your funds are permanently inaccessible. There is no reset, no recovery service, and no customer support that can restore it. MetaMask has no record of your Secret Recovery Phrase because the wallet is non-custodial. This is why backing it up before using the wallet is the most important step in the setup process.
Can I use MetaMask on my phone?
Yes. MetaMask is available on iOS from the App Store and on Android from Google Play. The mobile app has the same features as the browser extension, including wallet creation, network management, dApp connectivity via the built-in browser, and the swap function. You can import the same wallet on both devices using the Secret Recovery Phrase, and both will reflect the same on-chain balance.
Does MetaMask support Bitcoin?
MetaMask does not natively support Bitcoin on the Bitcoin network. The wallet is designed for Ethereum and EVM-compatible chains. However, you can hold Wrapped Bitcoin (WBTC), which is an ERC-20 token on Ethereum that tracks the price of Bitcoin. Some MetaMask configurations in 2026 support non-EVM chains through experimental features, but for direct Bitcoin storage and transactions, a dedicated Bitcoin wallet is the appropriate tool. MetaMask was built specifically for the Ethereum ecosystem: the guide on who created Ethereum covers how the network was designed from the start as a programmable platform.
What is a token approval in MetaMask?
A token approval is a permission you grant to a smart contract to spend a specific token from your wallet. When you use a DEX or lending protocol for the first time, it asks for this approval before it can process your transaction. The risk is unlimited approvals, which give a contract indefinite access to that token regardless of how much you originally intended to spend. Use Revoke.cash to audit and remove any approvals you no longer need.
Is MetaMask free?
Downloading and using MetaMask is free. There is no subscription fee. MetaMask charges a 0.875% fee on swaps made through the built-in swap function. All other transactions, including sending and receiving ETH or tokens, require only a gas fee paid to the Ethereum network, not to MetaMask. The gas fee goes to validators, not to ConsenSys. If you want to convert ETH to fiat after using MetaMask, the guide on how to sell Ethereum covers the process from wallet to bank account.